An ode to swatching: when, why, and how to swatch
I’ll be the first to admit that I hate swatching. Personally, it feels like a waste of yarn. I’ve been caught up in one too many games of yarn-chicken to be so blasé about spending a good chunk of yarn on something that will sit there, abandoned, once you begin knitting your garment.
I often find that when I’m itching to cast on a new, exciting project, I can’t find the patience to sit down and swatch before jumping right in. Also, with my tried-and-true yarns like Drops Air, I catch myself thinking “I know this yarn. I know how it knits up. Swatching is pointless.”
Yet, time and time again, swatching has proved extremely useful to designing and making a well-fitting sweater that stands the test of time. (and the blocking process)
What is swatching?
Maybe you’re brand new to knitting and you find yourself wondering what all these patterns are asking you to do before ever casting on the first stitch.
Swatching is a technique that ensures that you obtain the right tension needed with your yarn of choice and knitting needle size to accurately match the measurements of the finished item.
If you think of your knitting as a grid (which a swatch certainly is), it means that the number of rows and number of columns line up with what the designer has measured on their finished garment.
When your tension is correct, or when you meet gauge, your knitted item will be the same size as the measurements given by the designer. If you have too many stitches in your row or column when swatching, you will need to use bigger knitting needles or thicker yarn. Conversely, if you have too few stitches in your row or column when swatching, you need to use smaller knitting needles or thinner yarn.
Of course, you won’t know any of this unless you swatch (or venture a good way into knitting your sweater/hat/vest, only to have to unravel and start over again – one of the most painful knitting experiences).
When is swatching particularly useful?
A wise knitter would say “always”. Even if you are using the same yarn and needles that the pattern recommends, it is important to remember that everybody holds their yarn slightly differently and knits slightly differently, and so your tension might be different from the designers’ own.
However, there are a few key instances where I would definitely recommend that you don’t cut corners and swatch before you start:
1. When you are working with a yarn you have never used before. Especially if you are using this yarn in an intricate cabled or structured pattern like the Soldag or Liscannor Sweaters. You don’t know how the stitch definition will look like and whether this yarn will be well-suited for the project. Always swatch first to make sure
2. When you are working with superwash yarn. And in this case (and really every other case), “swatch” should really mean “swatch and block”. Superwash yarn grows a lot during the blocking process, and it is really important to know just how much before you start knitting. (I learned this lesson the hard way – and now I have a hat that looks like it was made for a giant’s head!)
3. When it is really important that your item has the right dimensions. This could be true for a knitted balaclava or a fitted blouse or sweater. The fit will look quite odd, and the garment might be unusable, if you don’t make sure you meet gauge before starting on the project.
Why do we swatch?
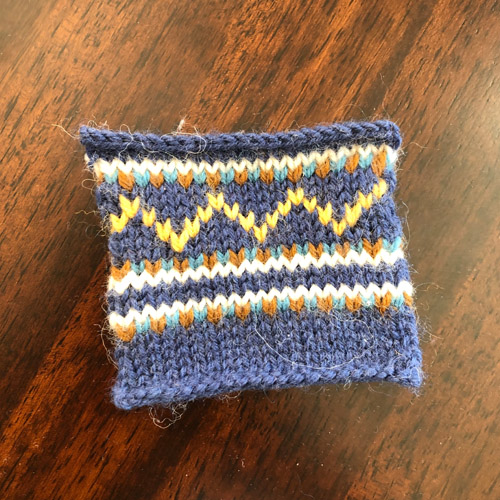
The biggest reason, as mentioned above, is to make sure that you are meeting the designers’ specified gauge for a project so that you don’t have an enormous hat or baby-sized sweater at the end of a lot of hard work. However, another cool thing I learned when I started designing garments is that swatching is a cool way to play with different patterns and stitch textures on a variety of yarns to see what gives you the best overall effect.
I did this a fair bit with the Liscannor sweater – a strukturstrikk project that relies a lot on the relief effect between knit and purl stitches in order for the motifs to really pop. Because I was using a fluffy blow yarn – Drops Air – some of the textures that I had invisioned and that looked really nice on solid merino yarns just didn’t have the same effect on Drops Air and you could barely see the pattern. So there was a lot of ripping back and from then on, I made sure I swatched and blocked every motif before it went on the final sweater.
Some designers are marvelous swatchers and keep a swatch dictionary so that they can revisit and see what their swatches looked like with various yarn combinations on different needle sizes. The Knit Purl Girl in particular does this really well (I tend to “swatch and unravel” because I still can’t quite bring myself to “waste” yarn on a swatch, but I’m aspiring to become more methodical and devote some time to swatching as a long-term investment).
So now that we’ve talked about the benefits of swatching and why it’s something any knitter should do before embarking on a new project, let’s discuss how to make a swatch.
Typically, designers will specify the pattern for the swatch. (It does irk me when this isn’t written down, especially if the design has multiple structural components all of which manipulate the fabric in different ways).
Generally, however, swatching is done in the main stitch profile of whatever garment you are knitting.
To make a swatch, cast on the number of stitches specified for the designer for a 10 cm square (or divide in half if you’re in a time crunch and measure for a 5x5 swatch) with 4 additional stitches.
Two of these stitches on each side will be your “selvage stitches” and you’ll knit them in garter stitch the whole way up. Knit the first 2-4 rows of your swatch in garter stitch, then knit the number of rows specified by the designer, and finish with 2-4 more rows of garter stitch.
Measure your swatch between the garter stitches – this will give you a more accurate depiction of whether your gauge fits.
When you’re anxious to cast on a new project, swatching can seem like the last thing you want to do. But at the end of the day, it’s an hours’ work (at most) for the peace of mind that you will have a well-fitting garment after many more long hours of work.
Take it from a once-hesitant and now reluctantly converted swatcher – it’s worth it every time.